Instructions for Interactive Rooms
Welcome to the new 2014 AVEC. We hope that this experience will be smooth and that your students will benefit from the latest technology. Here is how to connect:
There should be an iPad mini in room located at the credenza. If you touch the screen, something similar to the image below should come up.
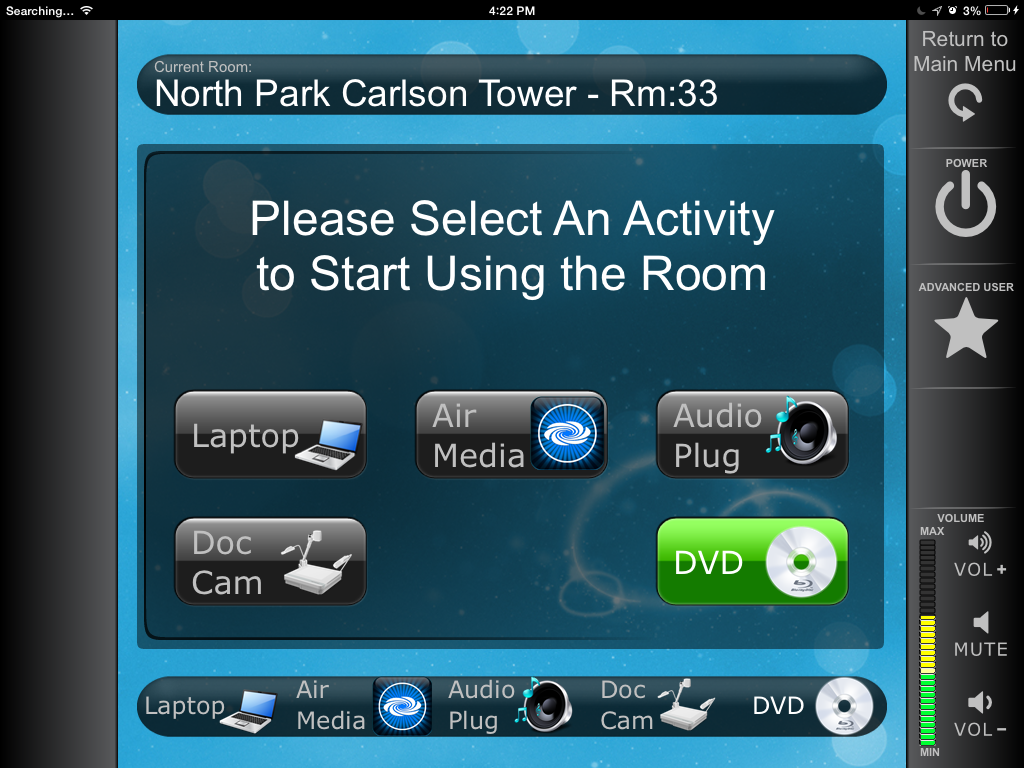
TO GET STARTED with Laptop
- Make sure that your laptop is on
- connect the HDMI or VGA cable to the laptop (Johnson Center will only have an HDMI connection)
- WAIT for the Connect It lights to turn from blue to green (the
- System will come on and you are ready to go
OR
- Make sure that your laptop is on
- Press "Laptop"
- connect the VGA or HDMI cable to the laptop (click on the provided link know which adapter you will need for your class: Connectors & Adaptors)
- WAIT for the "Connect It" lights to turn from blue to green
- System will come on and you are ready to go
To get more information on the capabilities of Connect IT, please click on the link provided: "Connect It"
The Connect It section will look like this:
Interactive TV
If you are going to use the interactive display for annotation (like a digital whiteboard), please connect the USB cable to your USB Port on your laptop device. Make sure that you have the appropriate software for annotation and writing (e.g. SMART, Sankore, or Sharp) If you need the SHARP or SANKORE software installed onto your laptop, visit this link: Interactive Software
TO GET STARTED with Air Media
- Make sure that your laptop is on
- Press "Air Media"
- WAIT for the system to come on
- You should see the To begin your presentation instructions on the displays. Follow directions on the display, it will look similar to this

*Note* The address that you will put into the browser is a hostname address. These names are specific to the room that you will be teaching in. It will look similar to the address that is provided above (http://AirMedia-01f8b0)
Please click on the provided link to see more information about Air Media: Air Media
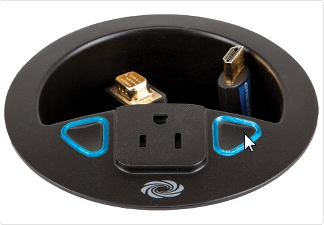
TO GET STARTED with Audio Plug
*only in rooms with VGA connections*
- Plug in audio source to "headphone" cable (3.5 mm)
- Press "Audio Plug"
- WAIT for the system to come on
- you are ready to play sound (be aware of the volume options)
TO GET STARTED with Doc Cam
- Press "Doc Cam"
- WAIT for the system to come on
- Displays should show the Doc Cam, if not make sure doc cam is on by pressing "ON" within the control menu options
- Doc Cam is ready to be used
- If control options are needed, you can have access to the on board buttons or the control options on the iPad mini:
The control options on the iPad mini looks like this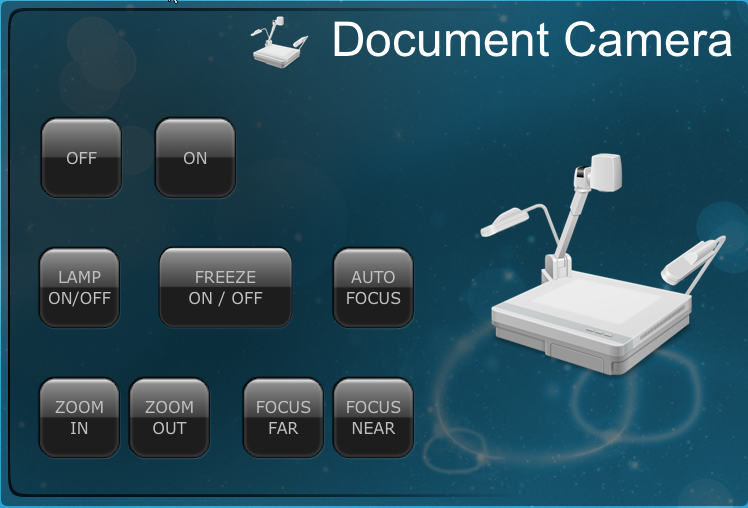
TO GET STARTED with DVD
You can play BluRay, DVD, CD discs with the DVD player
- Press "DVD"
- WAIT for the system to come on
- Displays should show the DVD main menu
- DVD is ready to be used
- To insert disc, press the "EJECT" button either either on the dashboard, or directly on the DVD player
- Place the disc on the tray. Close the tray by pressing the "EJECT" button again
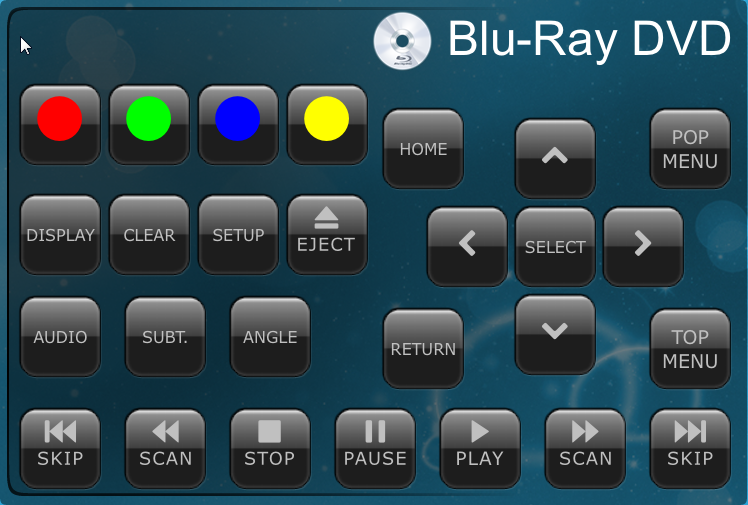
- Please look at the image below to see the remote controls for the system:
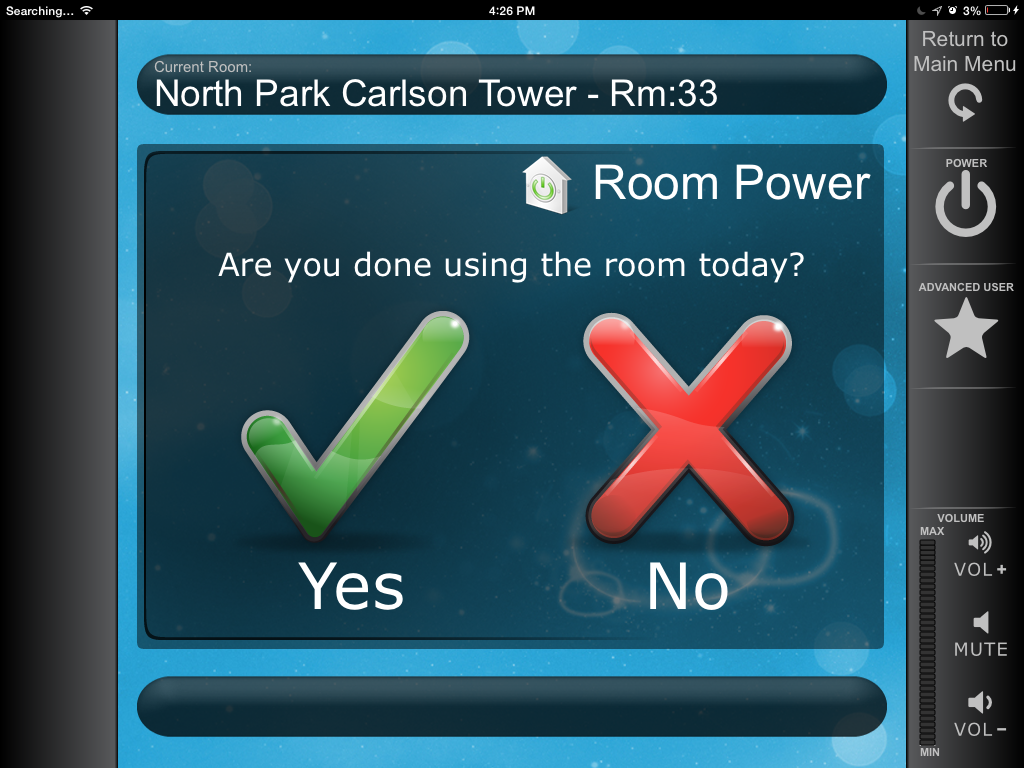
TURNING THE SYSTEM OFF!!!
When you are done, please turn the system off by pressing the "POWER" button and confirming that you are done using the room
Advance Options
The new AVECs also have advanced options such as choosing different sources for the displays and choosing sources for lecture capture. Please contact IT for more information or a demonstration.
Click on the provide
Echo360
The interactive rooms are also equipped with Echo360 capture devices. Therefore, you have the ability to record your lecture and put it online. For more information on Echo360, please click ont he provided link: /wiki/spaces/ITKB/pages/8489076366.