Microsoft Forms
Microsoft Forms is a O365 application that can be used to create quick and simple forms and quizzes to gather data/information or administer quizzes or polls.
To create a form
Get help to start creating a form/quiz here: https://support.microsoft.com/en-us/forms?ui=en-US&rs=en-US&ad=US
Once users have filled out an instance of your form, the responses are either saved in an Excel spreadsheet on OneDrive (if individual/traditional form) or in Sharepoint if it is a groups form. Please see the section 'Group Forms vs. Traditional/Individual Forms' in this document for the difference between a traditional form and a group form.
Settings
You can change the settings of your form by clicking on the ellipses button (...) in the upper right hand corner of the form and selecting "Settings"
Below is a description of the different setting options

Who can fill out this form will allow you to control who can fill out the form
- Anyone can respond - anyone who receives a link to the form whether or not they are within or outside of NPU can fill out this form
- Only people in my organization can respond - anyone who receives a link to the form and is an active student/faculty/staff member of NPU can fill out this form. If this is an anonymous form, then you will want to have the "Record Name' checkbox unchecked. This tends to be the most common option here at NPU.
- Specific people in my organization can respond - you can assign certain people or groups to be the only ones allowed to fill out this form
This can also be controlled by clicking on the "Share" button and selecting the correct option in the 'Send and collect repsonses' area


Accept responses - If this setting is unchecked, you turn off the ability to collect any additional form responses.
Start date and End date - You can specify an exact date and time when you want to start and stop collecting form responses.
Shuffle questions - When this is unchecked (default setting), questions are displayed to respondents in the same order you created them. When this option is checked, the order of questions displayed will be randomly shuffled. Each respondent sees the questions in a different sequence.
Show progress bar - Respondents will see a visual indicator of their progress while completing a form or quiz. Note: The progress bar is only available on forms and quizzes that contain multiple sections or pages.
Customize thank you message - Display a thank you note upon completion of your form or quiz. Click in the text box to create a customized message.
Allow receipt of responses after submission - After completing the form, respondents will have the option to save or print a PDF of the form with their filled-in answers on the “Thank You” page. Note that selecting this setting still allows form respondents, internal to your organization, to ask for an email receipt of their form.
Get email notification of each response - Get notified by email each time a response is submitted. If this is a group form, then everyone in that group will receive an email notification of each response.
Viewing responses from your form
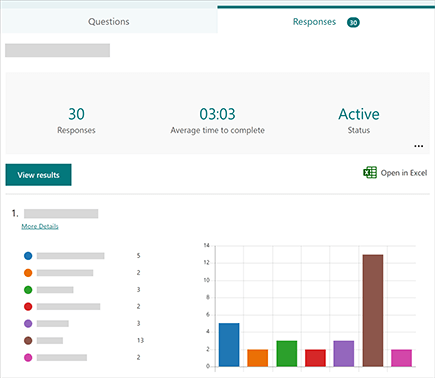
After you create your form, adjust its settings, and share your form with others, it’s time to view the results. Open the form for which you want to review the results, and then select the Responses tab.
Select View results to see individual details for each responder, such as time it took to complete your form and the option(s) selected.
To easily view all of the response data for your form in an Excel workbook, select Open in Excel. The responses are either saved in an Excel spreadsheet on OneDrive (if individual/traditional form) or in Sharepoint if it is a groups form. Please see the section 'Group Forms vs. Traditional/Individual Forms' in this document for the difference between a traditional form and a group form.
Select the More Details link to see the name of each responder and their answers for each question.
Sending link to form for users to fill out form

First you will need to select who you want to fill out the form (anyone, only people in your organization, or specific people). This can also be controlled in the Settings of the form. Please see the 'Settings' section of this document for more information.
Next, you will choose how you want to ask for responses.

Select the Link button, and then click or tap Copy next to the text box that displays a web address. Copy and then paste this unique link wherever (e.g. a shared class notebook) your intended audience can see and click it to access your form or quiz. You can check the 'Shorten URL' to get a more shorter, more manageable link.

Select the QR code button, and then click or tap the Download button, which will download your QR code as a .png file. Insert the .png wherever your intended audience can scan it with a QR code scanner, such as a mobile device, to access your form or quiz.

Select the Embed button, and then click or tap Copy. Paste this embed code into a web page, Sway, or a document.

Select the Email button. When your designated email application opens, add email addresses of the people for whom you intend the form. Microsoft Forms includes a brief note in the email body and a link to your form. You can customize the email message as you like.
Sending link to form for others to edit/collaborate the form and see form responses
First you will set up

Users with an Office 365 work or school account can view and edit - Anyone with an Office 365 work or school account, inside or outside of your organization, is assigned co-authoring permissions and can view and edit your form.
People in my organization can view and edit - Anyone in your organization is assigned co-authoring permissions and can view and edit your form.
Specific people in my organization can view and edit - Only people or groups in your organization that you specify are assigned co-authoring permissions and can view and edit your form.
Next, Select Copy. You can now paste this link wherever your co-authors can access it, such as in an email, notebook, or Teams.
Anyone you've specified as a co-author that has access to the collaborate link of your form will be able to view and edit both questions and response data.
- If you are using a Group Form and want anyone within that Teams Group to be co-authors, then you must select 'Specific people in my organization can view and edit' and then select the specific Teams Group.
Group Forms vs. Traditional/Individual Forms
| Group Forms | Traditional/Individual Forms |
|---|---|
| Access to edit form and responses are controlled by adding/removing members to that specific group/team via Microsoft teams 1 | Access to edit form must be shared by link to specific people for them to co-author the form |
| If email notifications are selected to be sent when a response is received, then all members of that group/team will receive the email notification | |
| Reponses are saved in Excel spreadsheet on the group/teams Sharepoint site |
1 To have only members of the group have access to edit the group form and view the responses, you must select Specific people in my organization can view and edit option under the Share to collaboarate section and select the teams group you want to have access. If you do not do this, then anyone (or anyone within the organization depending on which option you select) with the link to edit the form can edit the form and review responses
Stay up to date with all of the current official instructions here: https://support.microsoft.com/en-us/forms?ui=en-US&rs=en-US&ad=US