Kandji Self Service
Available on North Park managed Apple computers, the Self Service application is a tool to help manage and update the computer.
Opening Self Service
The Self Service App will automatically install on all enrolled Mac computers. Self Service can be opened from either the menu bar or Launchpad.
From the Menu Bar
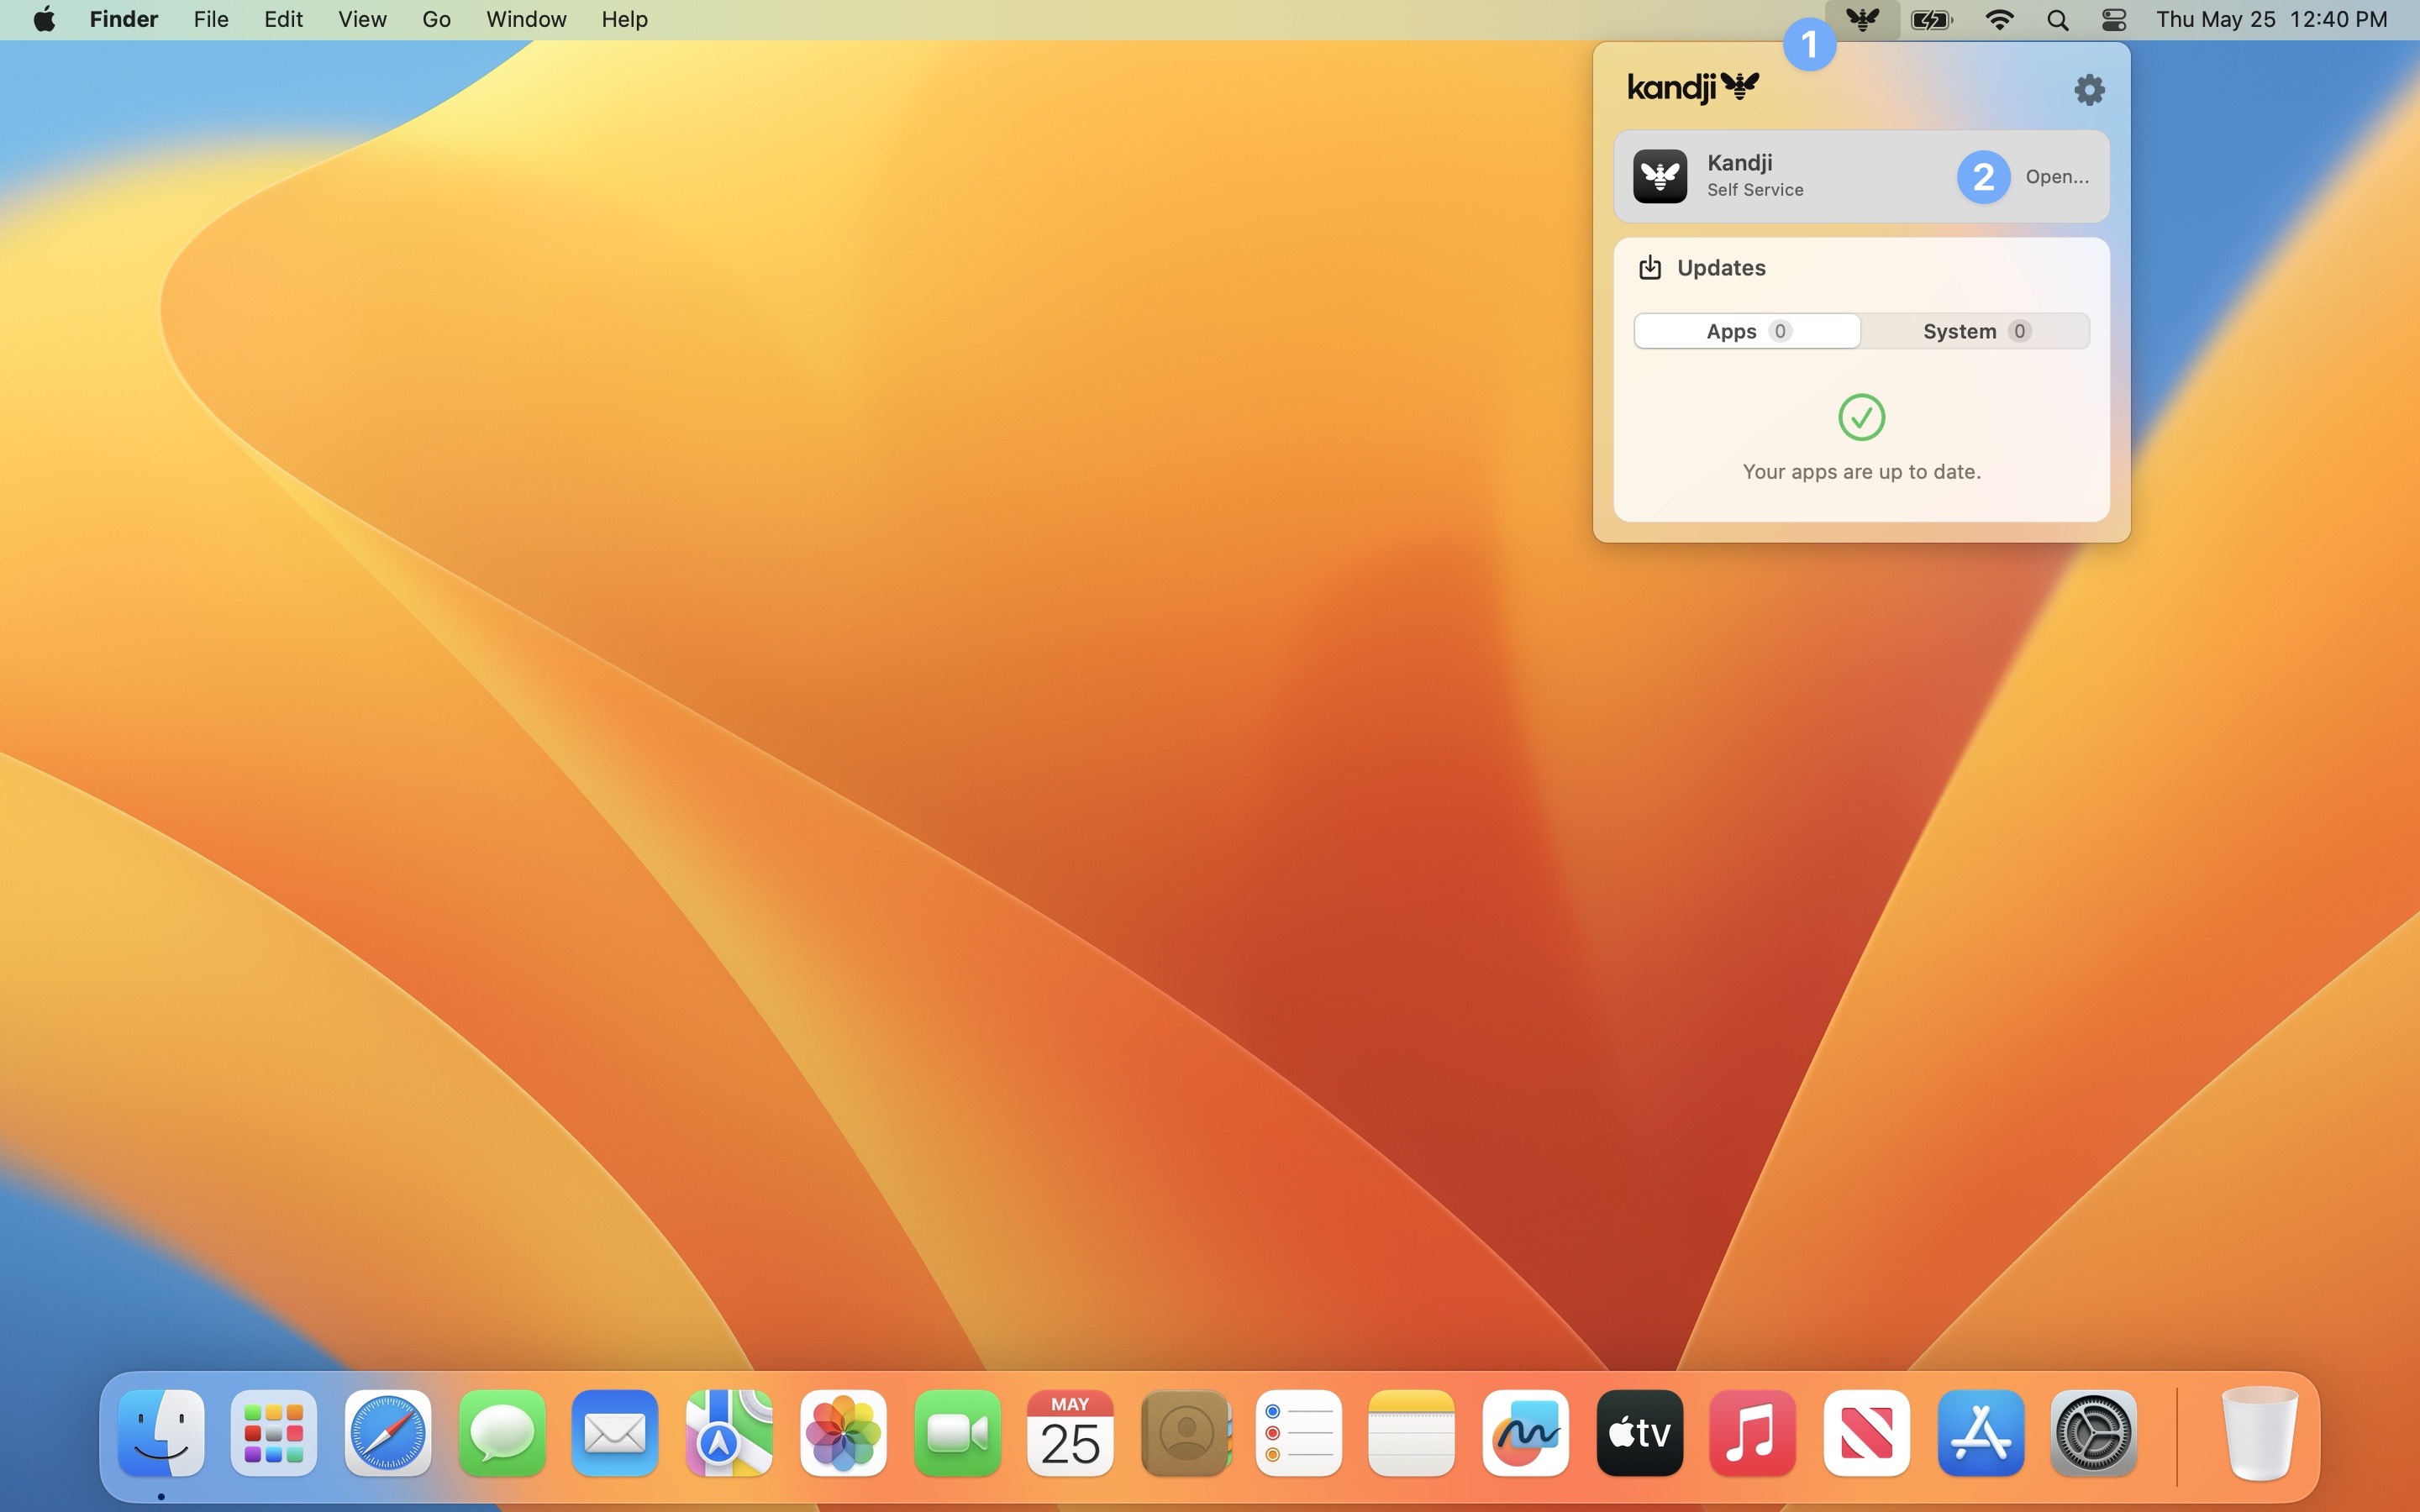
To launch Self Service from the menu bar.
- In the menu bar, click the Kandji logo.
- Hover over Kandji Self Service and Choose Open.
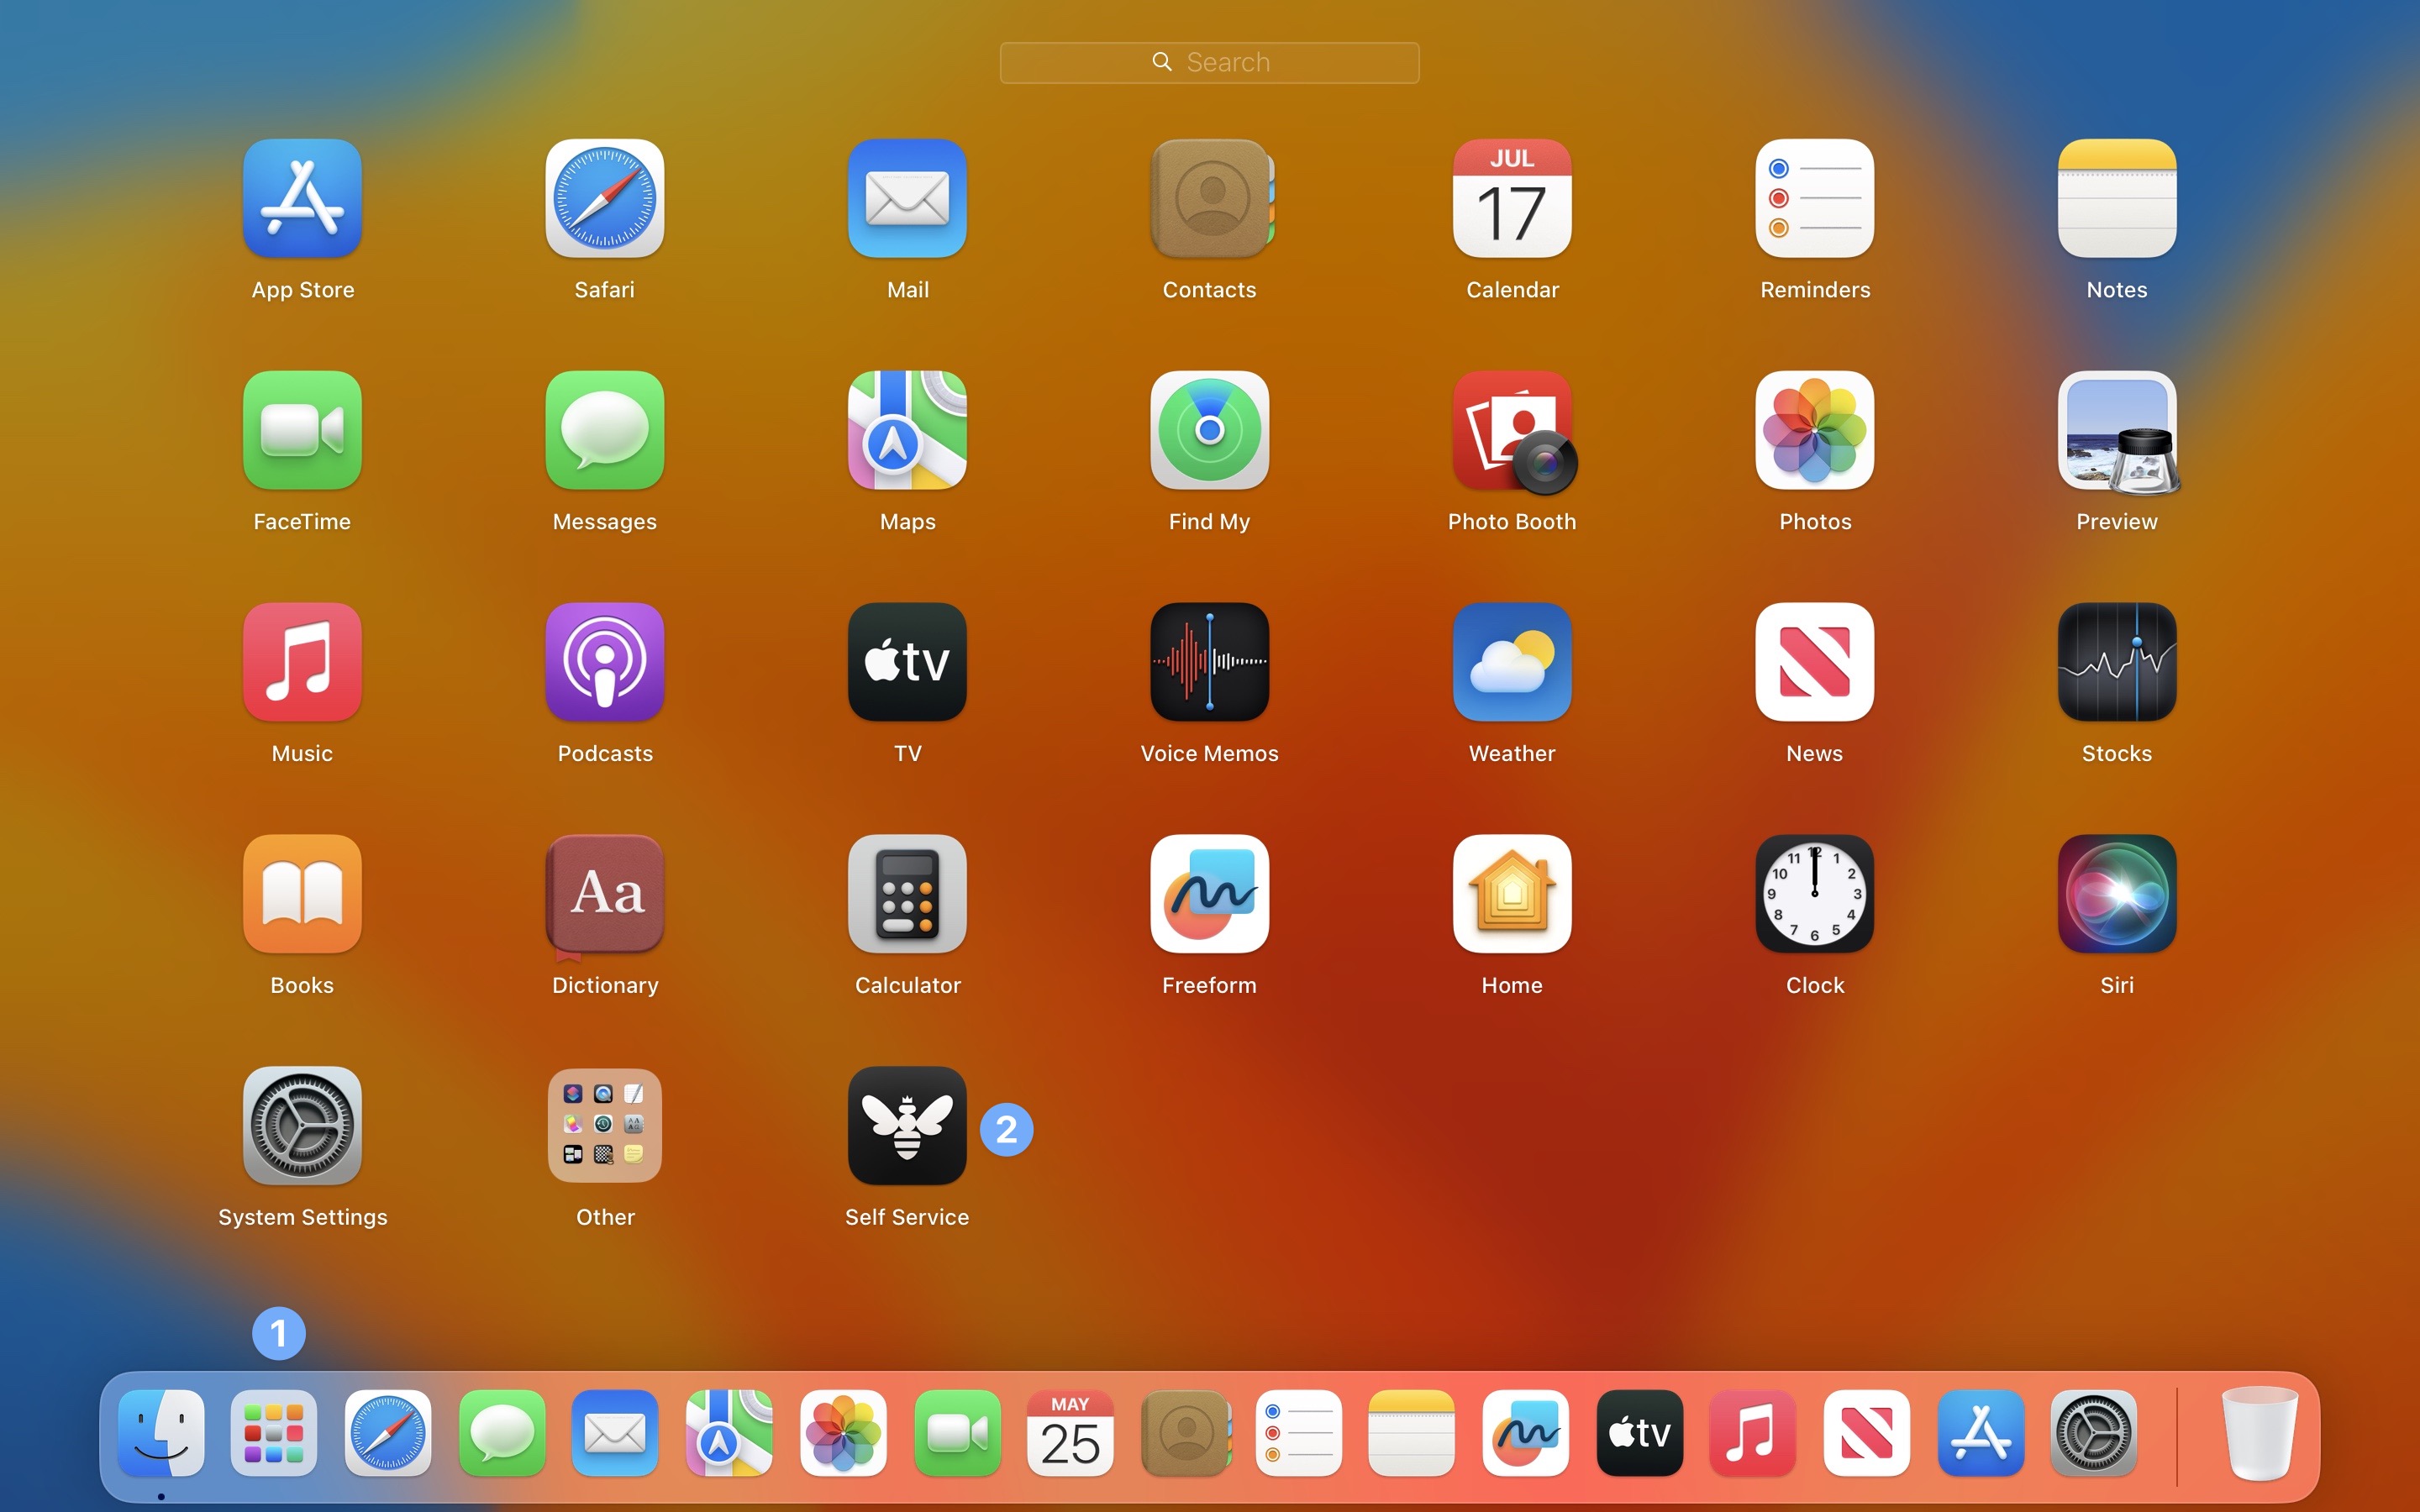
From Launchpad
To launch Self Service from Launchpad:
- In the Dock, click Launchpad.
- Click Self Service.
Navigating Self Service
The primary means of navigating within Self Service is the navigation bar on the left side of the app window. The All category will always be shown there. Any additional categories will automatically populate and display based on the library items assigned to the computer.
- Search: Search Self Service for available items.
- Categories:
- All: All items that are available in Self Service.
- Recommended: Any items marked by the administrator as recommended. Each item that's recommended has the Recommended icon displayed next to it (by default a star icon).
- Bookmarks: Give your users links to the resources they need at work in Kandji’s Self Service app.
- Other categories, depending on the organization's configuration.
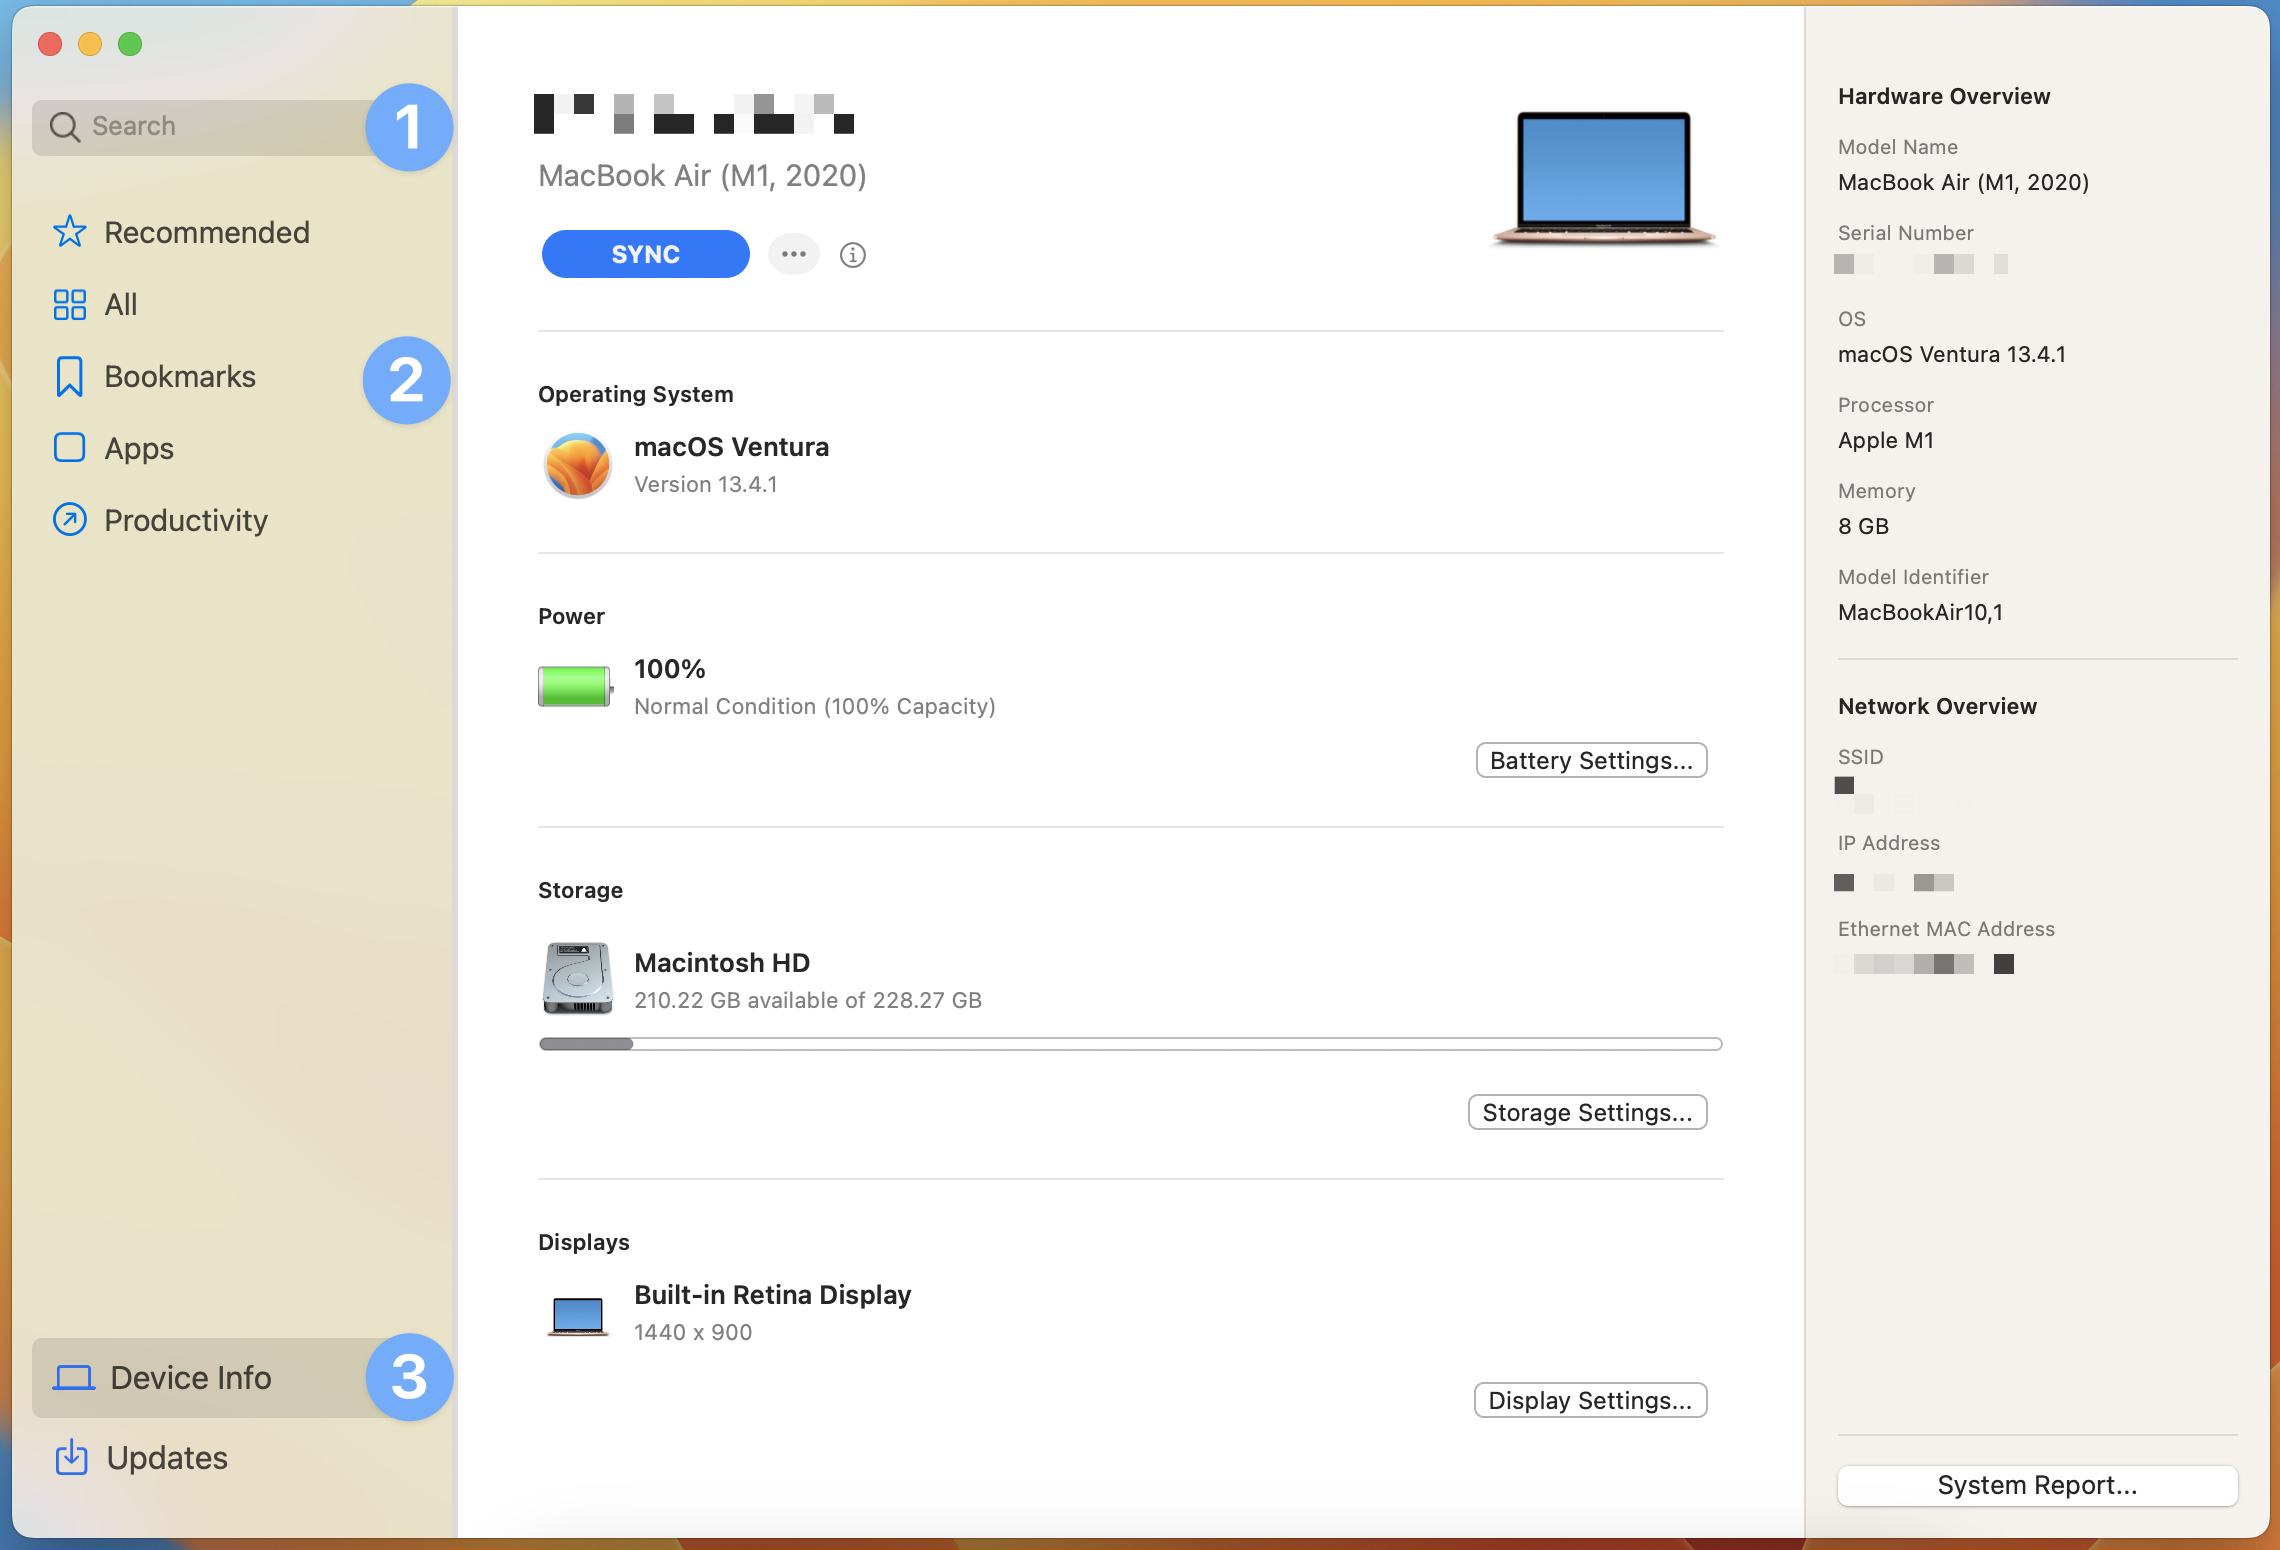
- Device Info: End users can now see key device information—such as OS version, power percentage, storage capacity, and even connected displays—on a single page.
- Sync Button: The Sync button allows end users to easily initiate device check-ins when requested by their IT administrators.
- Sync Button: The Sync button allows end users to easily initiate device check-ins when requested by their IT administrators.
- Updates: The Updates tab is a refresh of the previous Activity tab. End users can now see all applications installed through Self Service, with available updates grouped at the top of the page.

Installing Available Applications
Apps that are available for Self Service installation will display the following:
- App icon
- App name
- App description
- Install button
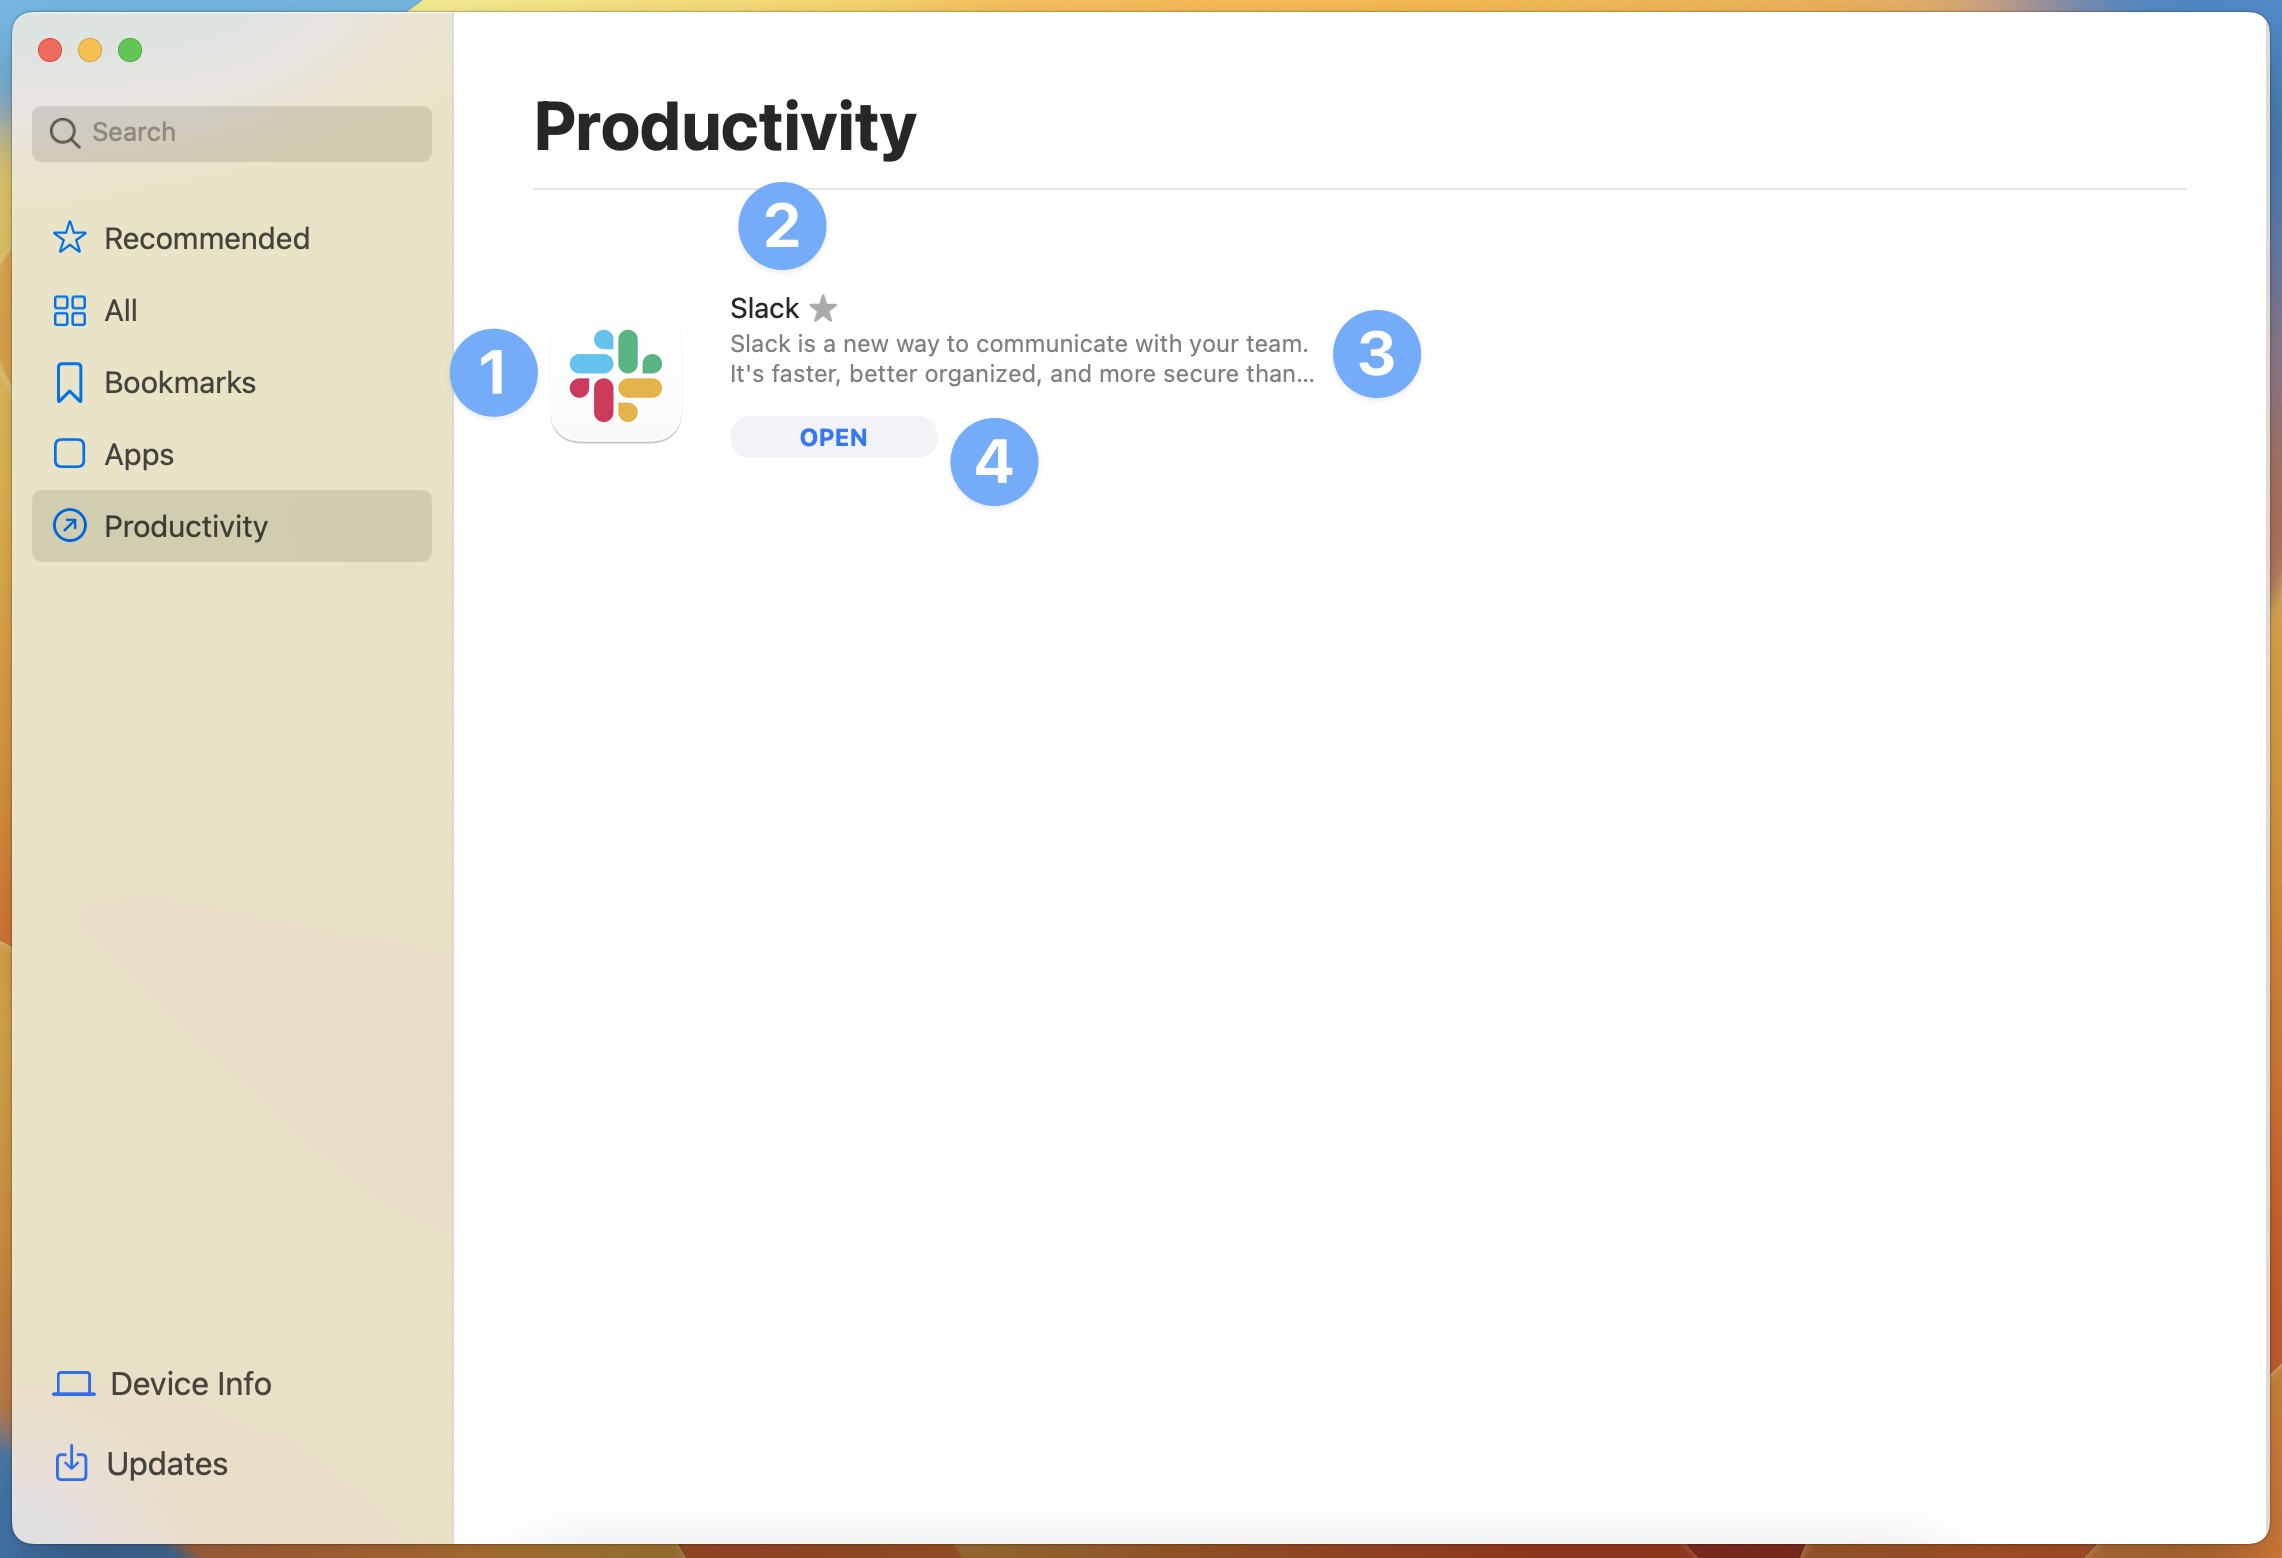
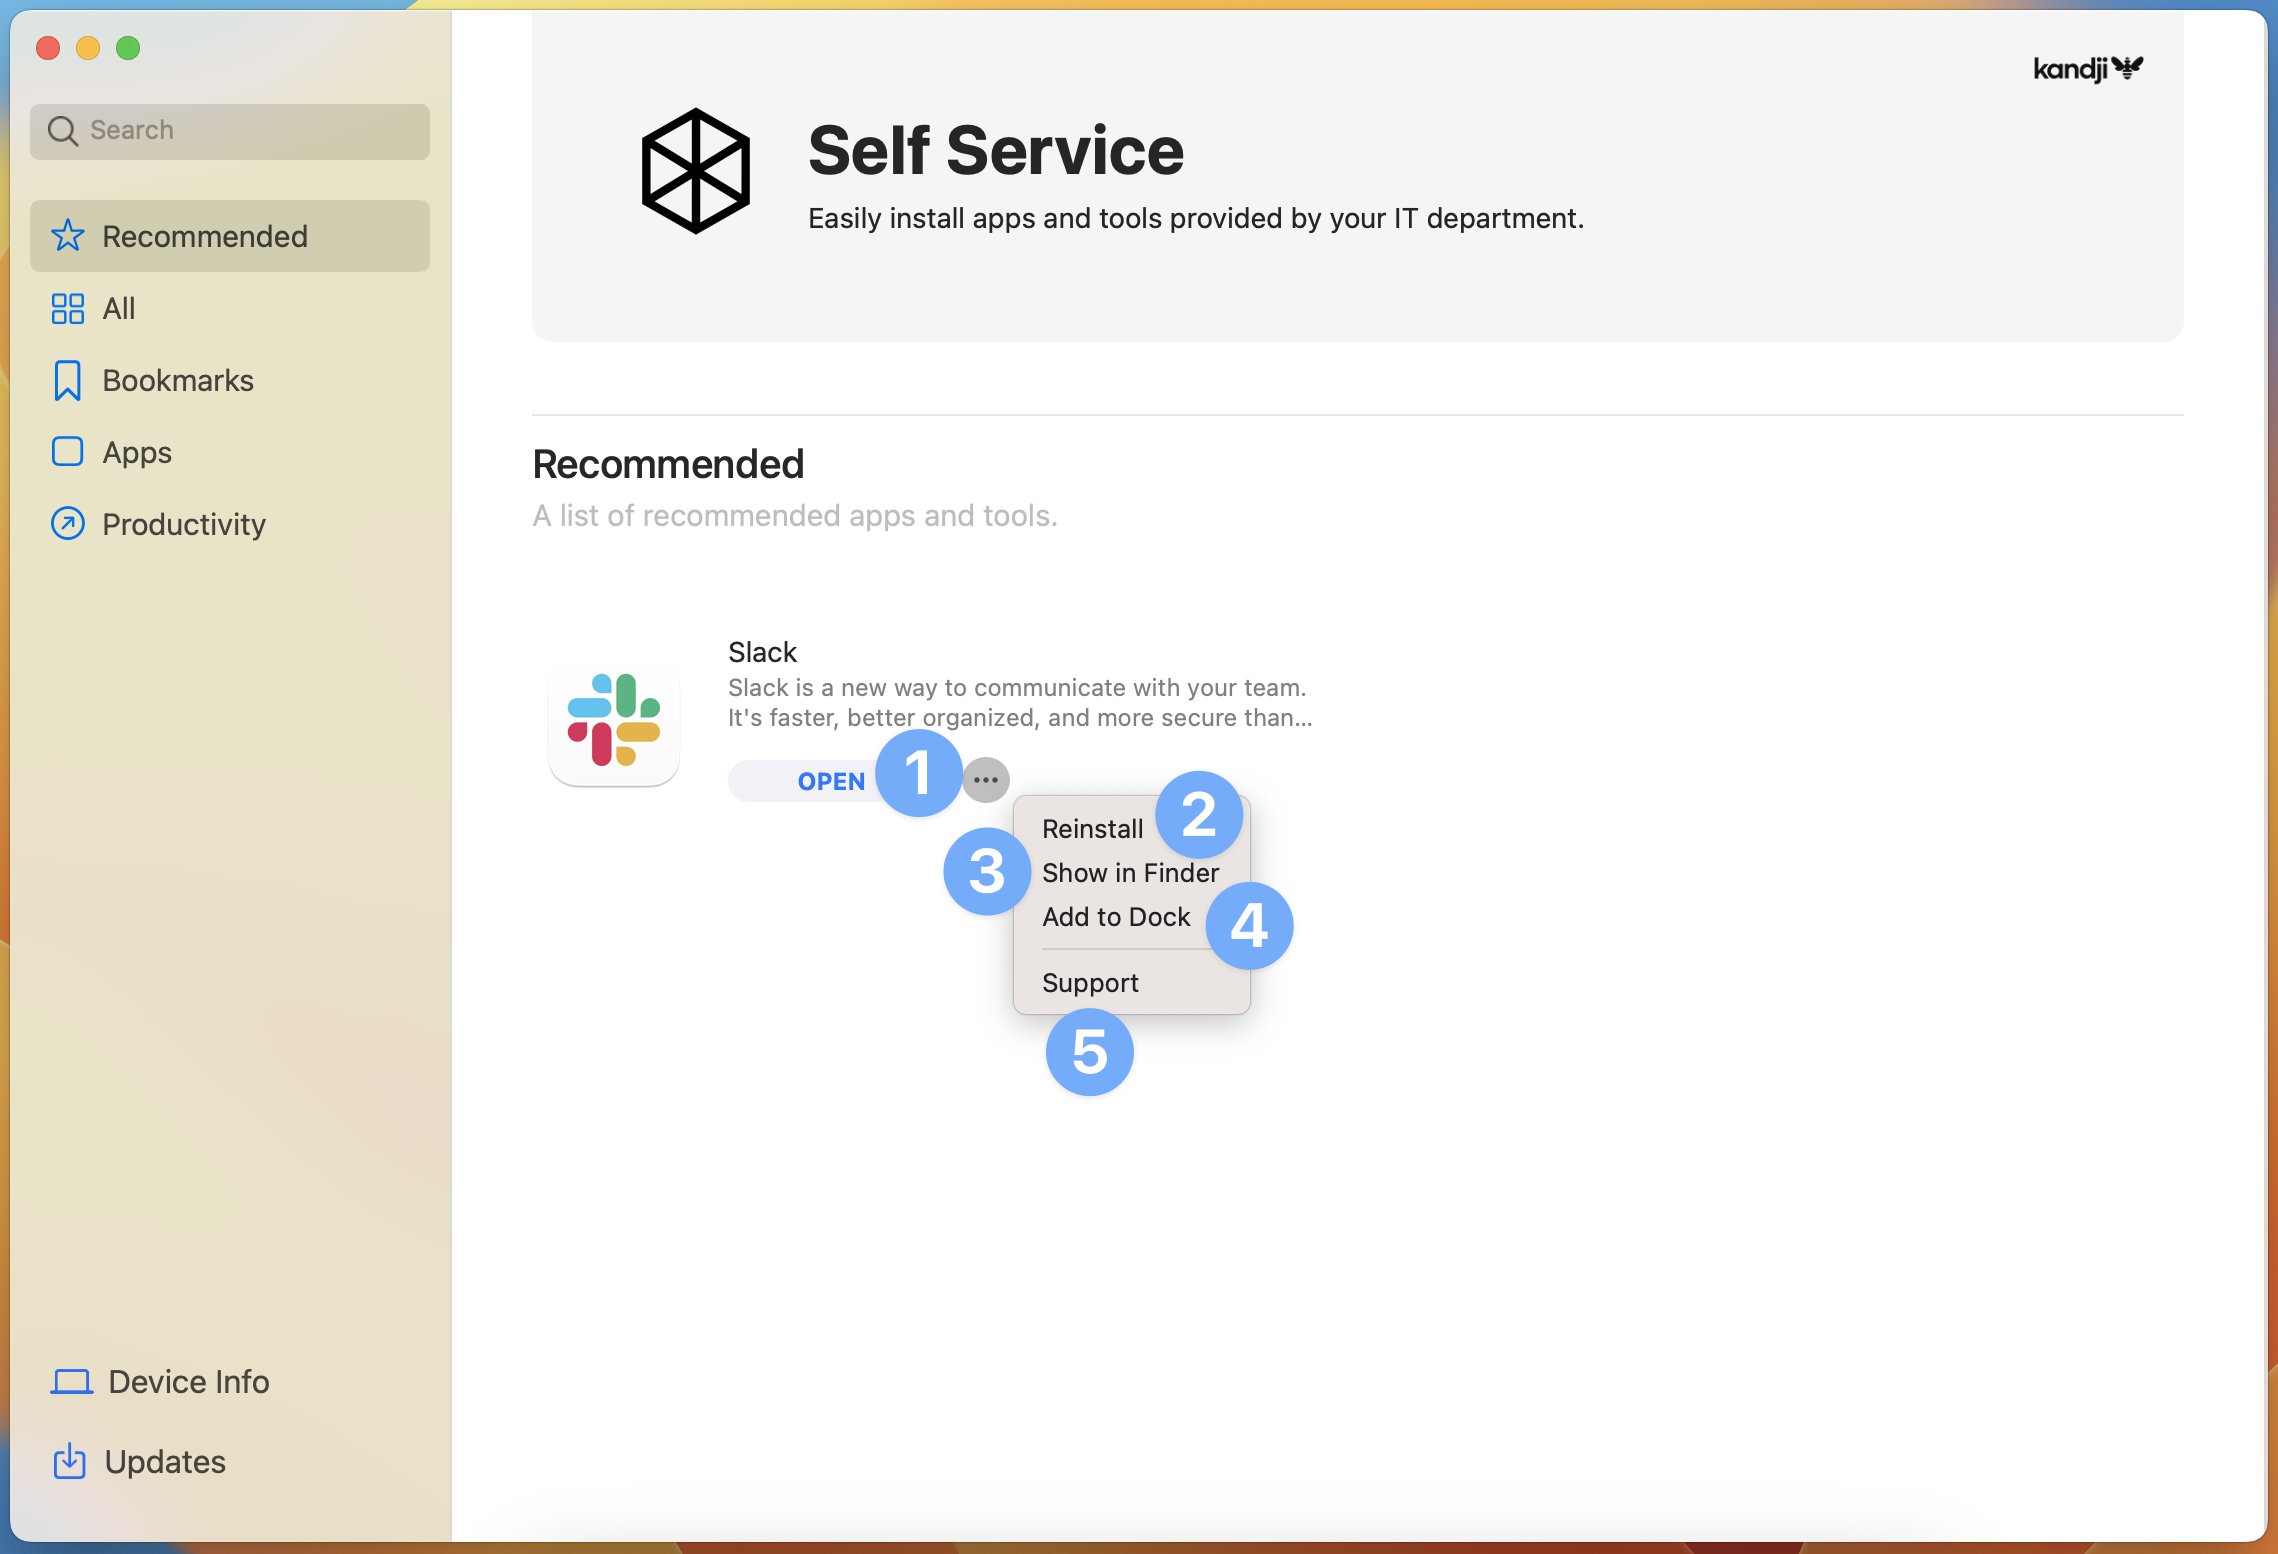
Clicking the Install button will download and install the app. After installing an app, that button will change to Open. To access additional options:
- Move the pointer next to the Open button and click the ellipsis. The following options become available:
- Reinstall the app
- Show the app in Finder
- Add the app to the Dock
- Open the app's support webpage
- Show the app in the App Store (Apps & Books apps only)
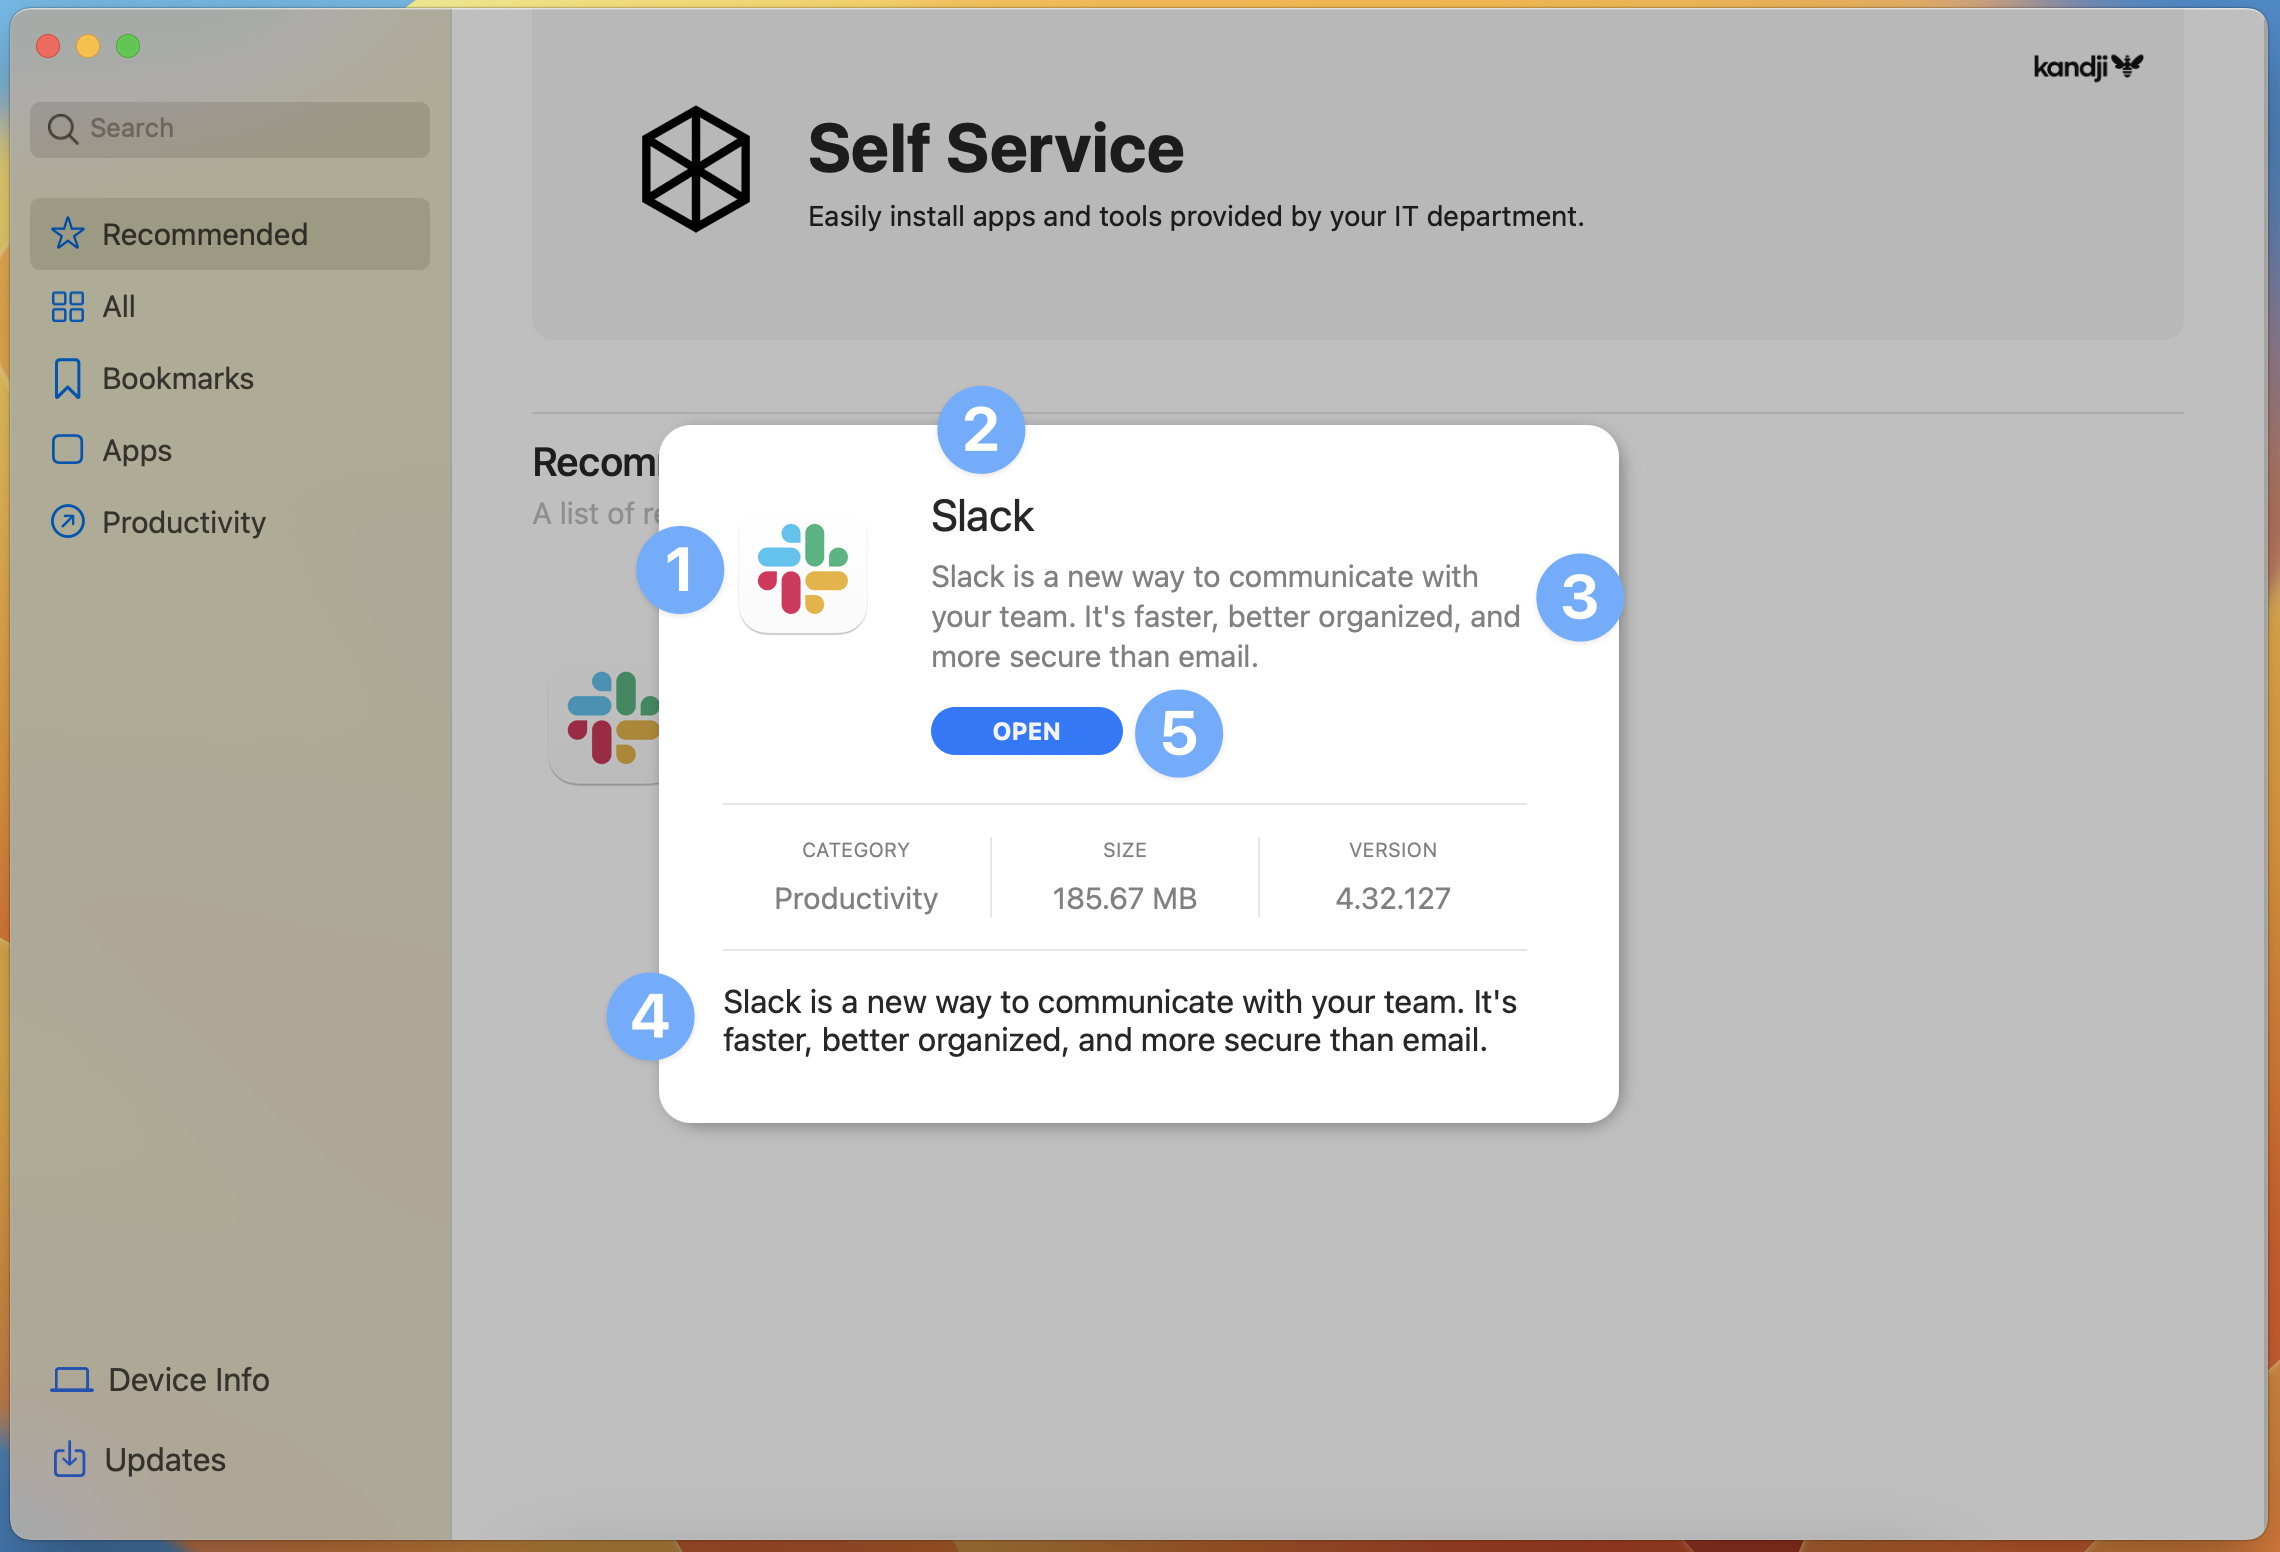
Clicking the App icon or App name will bring up additional information:
- App icon
- App name
- Short description
- Long description
- Install button or Open button (after an app has been installed the Install button changes to the Open button)